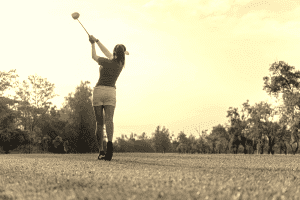
While it’s way more fun for most people to hit the range and practice hitting irons, wedges and driver, shooting your lowest score will always come down to how good your putting is. If your putter is your secret weapon, you’re going to be taking your friend’s money every single round; alternatively, if you’re the 3 putt king it’s going to be impossible to shoot low scores.
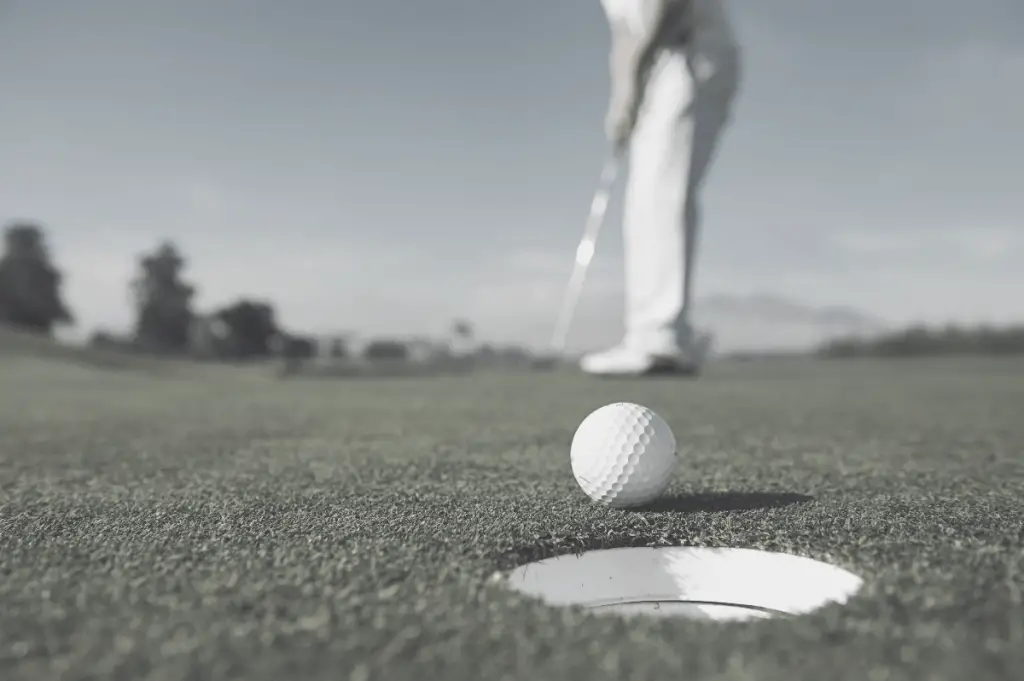
The idea behind putting is really straight forward: roll the ball into the cup, in as few strokes as possible. Every golfer knows that, but it’s deceptively hard to put into practice once you’re on the course.
I’m happy to provide you with some useful tips that will help you putt with deadly accuracy, and improve a key part of your game. Check out our guide below!
Putting Basics
When things are going bad during your round, most people will give the advice “go back to basics”. What they’re telling you is to pay attention to the fundamentals of your game, and execute.
Here are a few basics to putting that are absolutely essential to success when you’re putting!
Manage your putting Speed
When you’re working on putting, you’ll be working on producing 2 outcomes: speed, and direction. Obviously, nailing the right speed while putting is crucial.
Surely you’d want to nail both, but putting a ball with the right speed that is slightly off-line will miss the hole by a much smaller margin. If you absolutely had to choose one, you’d want to nail the speed every time you putt, setting yourself up for an easy tap in.
Utilize your warm up
You can play the same golf course every day and experience distinct differences in how the greens will play. There are always varying degrees of moisture and weather, so spending some time during your warm up to get a feel for the greens is crucial!
While warming up on the green isn’t as exciting as hitting the range, it will directly help you improve your round. Start by practicing shorter putts, aiming for consistency in your delivery. From there, play around from various distances to get an idea of the speed you’ll need on the course.
Speed on the course
While the practice green gives you a sense of how the greens are rolling that day, they just give you a glimpse of what to expect. Carefully analyze the slope of the green ahead of you, and account for adding or reducing speed based on the situation. For uphill putts, you’ll want to add more power to the shot, while the opposite is true coming downhill.
Putting grip
There are a variety of putting grips out there. While choosing your grip can be confusing, what matters is that the grip you choose feels natural and comfortable. Choose a grip, and stick with it for a while. If it’s not working for you after some practice, try something else out!
Reverse Overlap Grip
The most common putting grip used by professional golfers is the reverse overlap grip. Both Tiger Woods and Rory McIlroy use this grip while putting, and it is pretty easy to execute. To do this grip, put the palm of your right hand (if you’re right-handed, otherwise left) against the putter’s grip, with your right thumb facing straight down to the putter head. Your palm will be facing you.
Next, put your left hand on the club in the same way you would if using a strong golf grip, but with the index finger of the left hand resting on the other fingers of your right hand.
This grip should feel quite natural, and is absolutely textbook. This grip generally helps the putter face will stay square at impact, helping you roll the ball perfectly as intended.
Maintain a Light Grip
Whatever grip style you choose, always remember that you shouldn’t grip the putter tightly. A light grip guarantees that the force will originate mainly from your shoulder. Consequently, the putter will naturally rock back and forth without interruption from your wrists.
putting Stance
Alignment is always important in golf, and it can make a huge difference in your putting accuracy.
For a correct putting stance, start by squaring up the putter face to the target, placed just behind the ball. Once you’ve done so, build your stance around that. Many amateur golfers make the mistake of doing the opposite, which can end up sending your putt way off line. Aiming your putter first gives you a better chance of being on target.
Your knees should be slightly bent, while your upper body tilts forward, which will allow you to properly look at the ball. Your eyes should be directly over the ball.
I mentioned alignment once before, but I cannot understate how important it is to line your body up to your putt correctly. You’ll want to stand parallel to the club, with your legs about hip width apart.
Set up to your putt so that the ball is in the center of your stance. In that position, the putter is neutrally held between both hands, which will give you extra comfort to deliver the right impact.
Account for the break
Undulating greens are a part of the game of golf, and will significantly change how you approach a putt. You’ll need to account for the break when setting up to putt to set yourself up for success.
To account for the way a putt is going to break, you’ll need to be able to read greens well. Start by assessing how severe the slope you’re working with is. Unfortunately, learning how to account for break effectively will take some practice. After a few rounds, you’ll be able to visualize how the ball will move during the putt, painting a picture in your mind of how the ball will get into the hole.
Accounting for break is always going to be an educated guessing game, and players at all levels make mistakes here. Look at the putt from behind the ball, and then behind the target to get a full view of the slope you’re dealing with. Oftentimes, standing behind the flag will show you a bit more break than just looking from where your ball is.
Don’t overthink it
Every golfer has been in this situation before: you’ve got a chance to nail a simple putt and score. you analyze it, and stand over the putt a bit too long and end up missing, costing yourself valuable strokes. Ouch. I get anxiety watching tour players choke on easy putts when they think too hard about them.
Taking too much time overloads your brain with unnecessary information. It also builds up your adrenaline higher than it already is. Golf teachers came up with a simple approach to easily control your emotions. When approaching the putt, look at the ball, then the hole, then as soon as you look again at the ball, putt it.
Remember, read the putt, align your putter, and go for it!
Pay attention to course conditions
This is important because the weather directly affects the green speed. When it rains, the greens start getting slower. Even if there’s no apparent standing water, the slightest amount of moisture can cause a big effect and slow your ball down significantly.
In contrast, sunny weather dries out the grass, making the greens faster. It’s not uncommon for the greens to start out slower from the morning dew, and drastically change speeds as the day warms up and the greens dry out.
Overall, stay dynamic with the greens read. Recalibrate as the day going on, and take note when conditions change.
8 Putting drills to work on
Practice makes perfect. If you’re serious about wanting to lower your score, you have to work hard for it. So we present to you 8 of the best putting practices even the professionals do.
Clock Putting drill
This drill will help you nail down consistency on your shorter putts.
Arrange 4 balls around the hole in positions similar to the 3, 6, 9, and 12 positions on a clock. Then, in the same alignment, add 2 additional rows of balls each further by 3 feet, so you’d have a total of 12 balls.
Start putting the closest row, then proceed to the next one. The goal is to sink all balls consecutively. If you lose one, you repeat the drill.
This drill doesn’t only improve the technical part of your putting, it also builds up your confidence and endurance.
The Ladder Drill
This is a distance control drill to help you judge putting speed on command.
Place 4 tees on the same line at distances of 10, 20, 30, and 40 feet away from your starting position. Then from that position, and along a line parallel to the tee line, putt a ball to the tee at the 40, 30, 20, and 10 feet respectively.
Then from the position of the tee at 10 feet, and along a line between the two previous lines, putt a ball at the 40, 30, and 20 feet respectively.
The goal is to match the distance as close as possible to end up with a well-defined ladder. If you miss one ball by a visible difference, you repeat the whole drill.
In addition to enhancing your putting consistency, this drill also is great for building your confidence.
The yardstick Drill
Get a yardstick, and place it over a flat area of the green. Place your ball on one end and hit your putt. The goal is to get the ball all the way to the end of the stick without breaking.
This drill is excellent for practicing reading your line, and improving your ability to get a square impact with your putter face.
Since the ball doesn’t actually touch the green and the space needed for this drill is small, this can be one of your home drills.
The Putter Path Drill
On a flat area of the green, place two clubs parallel to each other and apart by a distance slightly bigger than your putter head. These clubs will act as the upper and lower boundaries between which your putter will move.
The goal is to putt a ball in the target without touching the clubs with your putter head. It’s important to keep the putter head as close to the ground as possible. Put a score you’d want to get and try to beat it each time.
This drill will make you more comfortable with your putter’s grip, ensuring that movement is originating from your shoulders, not your wrists.
The Manilla Folder Drill
Put a manilla folder on a flat area of the green at 10 feet away from you. The goal is to putt 3 consecutive balls that stop on the folder. You miss one, you repeat. Then increase the distance to 15, 20, and 30 feet when you get comfortable with the 10 feet.
The secret behind the manilla folder is its softness, this requires you to finely adjust your putting speed, and to account for possible texture changes on the greens.
The Gate Drill
This one is pretty easily recognized, and doesn’t require anything but 2 tees. The gate drill will help you work on the quality of your strike on the ball.
To do this drill, you’ll form a “gate” with your 2 tees: place them just wider than your putter, so that to hit a putt your putter will have to fit through the gate. Give yourself a bit of room on either side if you’re a beginner, but you’ll want it to be a pretty snug fit.
The goal is to pass both the ball and the putter through the gates without touching the tees. You can start with a goal of 10 consecutive strokes, and work your way through a harder objective.
The Jordan Spieth’s Target-Looking Drill
Jordan Spieth needs no introduction, and is known to be one of the best putters on tour. Time magazine has declared him as one of the 100 most influential people of 2016, claiming that he “exemplifies everything that’s great about sports.”
In this drill, the key is to look only to the hole and trust your hands and shoulders to do the putt.
To do it, set a ball 3 feet away from the hole. Take only one look to set the ball and square the putter. Then while looking at the hole, trust yourself, and putt the ball. Repeat the drill at increasing distances.
The longer you go, the harder it’s going to get, so you might want to only get the ball within few feet around the hole.
The Pull Back Putting Drill
This is another simple putting drill that’s pretty popular.
Start with a 10-foot putt. If you missed the hole, move the ball away from the hole by a length equal to your putter, then putt again. Repeat this until you putt the ball successfully.
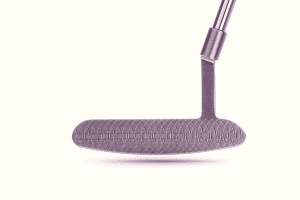
Bonus: Tips on Picking a Putter
Knowing how to pick the right putter will give you the tools you need to succeed on the course.
Putter’s Length
This one is truly subjective, so you’ll need to play around with it a bit. Try both longer and shorter putters, and settle on what works best for you.
To know the perfect length for you, stand in your putting stance, and let your arms hang naturally. The putter’s length is equal to the distance between the ground and the top of your hand.
Putter head
Here are a few things to evaluate on the head of the putter:
Alignment Aids
To make squaring the putter easier, some putters are equipped with visual aids like lines that mark their center.
Face Inserts
These are commercial covers that you can put to the putter’s face to serve your personal preference.
For example, non-metal inserts make hitting the ball smoother with a soft feel and sound. While metal ones make firmer feel and crisper sound.
Additionally, some inserts have groove lines that reduce the ball skidding after impact. However, this might not be allowed everywhere, so ask before using them to avoid penalties.
Weight
Another personal preference. Some putters can receive weight inserts to promote your feel and grip.
Putter’s Loft
The loft is the angle of the putter face. Zero loft means you’re using a flat stick. The ideal loft ranges between 3 and 4.5 degrees.
The higher loft makes the ball slightly bounce. The lower loft, on the other hand, pushes the ball to the ground, which makes it skid rather than roll.
In both situations, it’ll be impossible to control ball speed and putting length.
Final Thoughts
Putting is hard, and takes a lot of practice to get good at. That said, putting is the most important part of playing golf, and will be the difference in being good and great at the game.
In addition to the how-to-putt tips and practices we mentioned, watching professionals play can do the trick for you. Also, investing in a good putter that fits you well can be a clever step to take toward a better professional level.
Thanks for reading!